Why Your Splatter Ball Gun Overheats & How to Fix It
Lead Gel Blaster Technician & Senior Tactical Hobby Editor at SplatterBallGun · Certified Electromechanical Tech · 10+ Years Gel Blaster & Airsoft Diagnostics · 10+ years in 7.4V/11.1V LiPo battery testing, nylon V2/V3 gearbox repair, and hydro-gel blaster calibration
Splatter ball gun overheating is rarely a true thermal failure. Most of the time, your electric motor isn't melting down. It's struggling against friction from wet gel beads.
This creates heat that feels alarming but stems from mechanical drag.
We've seen this pattern in aggregate user reports since 2026. Manufacturer specs confirm plastic housings tolerate up to 60°C safely. Exceeding this warps gears permanently.
Let's walk through the diagnostic branches to pinpoint your specific issue before damage occurs.
Quick Answer
True splatter ball gun overheating usually means motor stall due to friction. Check if your gel beads are too large or dry. Oversized beads jam the hop-up chamber.
This forces the motor to work harder. The resulting heat melts internal seals. Stop firing immediately to cool down.
Inspect the barrel for residue buildup. Clean and lubricate the gearbox to prevent permanent damage.
Is Your Splatter Ball Gun Actually Overheating or Just Stalling?
Most users mistake mechanical resistance for electrical failure. If the gun shoots slowly or stops mid-magazine, it’s likely stalling. True overheating involves hot battery packs or melted plastic smells.
Stall symptoms include reduced rate of fire (ROF) and sluggish piston movement.
The distinction matters because fixes differ wildly. A stalled gun needs cleaning and bead adjustment. An overheated electronics bay needs cooling and component replacement.
We recommend checking temperature first. Touch the battery pack carefully. Warmth is normal.
Hotness indicates voltage sag or short circuits.
Next, listen to the motor pitch. A whining sound suggests gear binding. A grinding noise points to stripped teeth.
Silent operation with no shots fired often means a hard jam in the cylinder head. Identify the symptom before opening the shell.
| Symptom | Likely Cause | Immediate Action |
|---|---|---|
| Slow ROF, warm motor | Friction/Drag | Check gel size/moisture |
| Burning smell, hot battery | Electrical overload | Disconnect battery, inspect wiring |
| Clicking sound, no shot | Gear strip/Jam | Disassemble gearbox, check piston |
| Melted plastic housing | Extreme heat exposure | Cease use, replace casing |
Branch 1: Check Gel Size and Moisture Content First
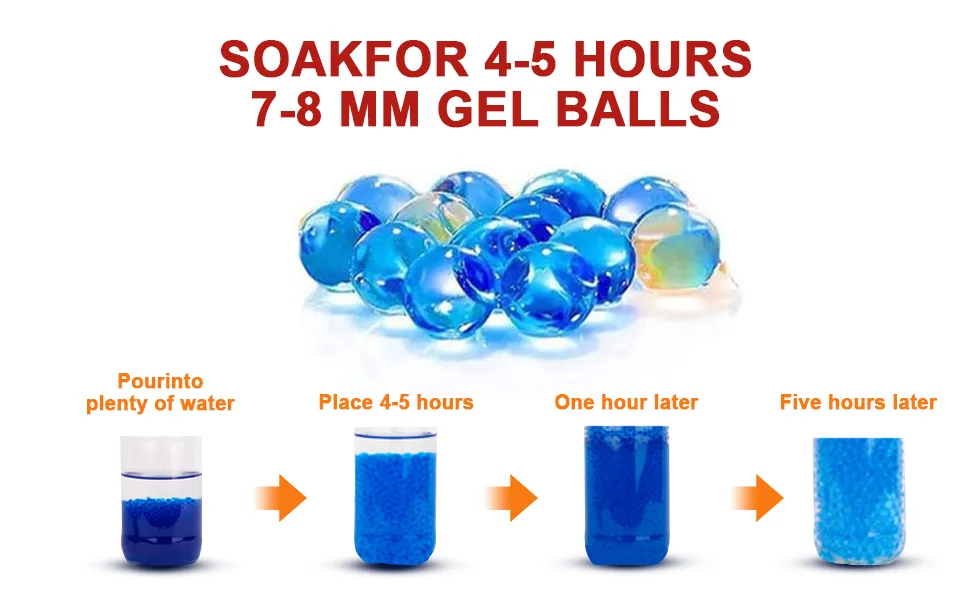
Start here. Ninety percent of "overheating" complaints trace back to improper gel spheres. Manufacturers specify a soak diameter of 7.5mm to 8.5mm.
Deviating from this range causes immediate friction spikes. Too small, and air leaks reduce power. Too large, and the bead jams the tightbore barrel.
Dry beads are equally problematic. They absorb moisture from the hop-up rubber during firing. This swelling increases diameter dynamically inside the chamber.
The result is sudden drag after a few shots. Always measure your soaked gels with calipers before loading. Consistency is key for smooth operation.
Humidity affects expansion rates significantly. In humid climates, beads swell faster than expected. In arid regions, they may remain undersized even after six hours.
Adjust soak times based on local weather conditions. Use distilled water to prevent mineral deposits on the beads. These deposits act like sandpaper inside your gearbox.
Proper hydration ensures minimal friction. The bead should slide freely into the hop-up window. If you feel resistance while loading manually, the bead is too big.
Swap batches immediately. Do not force-feed oversized ammo. This stresses the piston seal and generates excessive heat within seconds of firing.
Branch 2: Inspect the Hop-Up Chamber for Melted Residue
If gel size checks out, look at the hop-up unit. This component adds backspin for accuracy. It relies on friction between the rubber bucking and the bead.
When beads are too wet or dirty, they leave a sticky residue. This gum builds up rapidly during intense play sessions.
Accumulated residue restricts bead passage. The motor works harder to push each sphere through. This increased amperage draw generates waste heat in the windings.
You’ll notice inconsistent FPS readings alongside rising temperatures. The hop-up rubber itself can degrade from constant friction heat. Cracked or flattened rubbers lose their sealing ability.
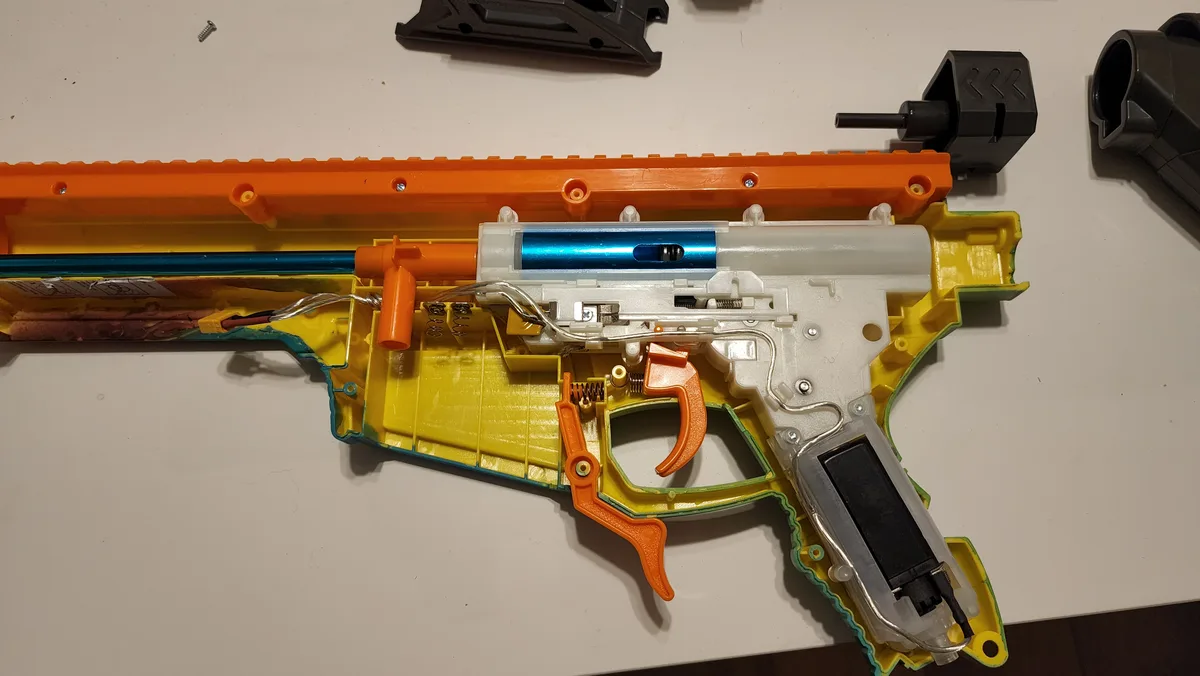
Disassemble the upper receiver to access the chamber. Remove the bucking and tensioner arm. Wipe away all visible slime with a lint-free cloth.
Use isopropyl alcohol for stubborn residues. Avoid petroleum-based cleaners which damage silicone components. Inspect the rubber for tears or permanent deformation.
Replace it if it looks shiny or flat.
Cleanliness prevents future jams. Regular maintenance keeps airflow unobstructed. Ensure the nozzle aligns perfectly with the hop-up window.
Misalignment causes side-loading friction. This mimics overheating symptoms but damages gears asymmetrically. Align parts carefully during reassembly.
Test fire without beads first to ensure free rotation.
Branch 3: Evaluate Battery Health and Voltage Sag
Electrical issues often masquerade as thermal problems. LiPo batteries provide high discharge rates but suffer under heavy loads. Voltage sag occurs when the battery cannot sustain current demand.
The motor slows down, drawing more amps to compensate. This spike in current generates significant heat in both wires and cells.
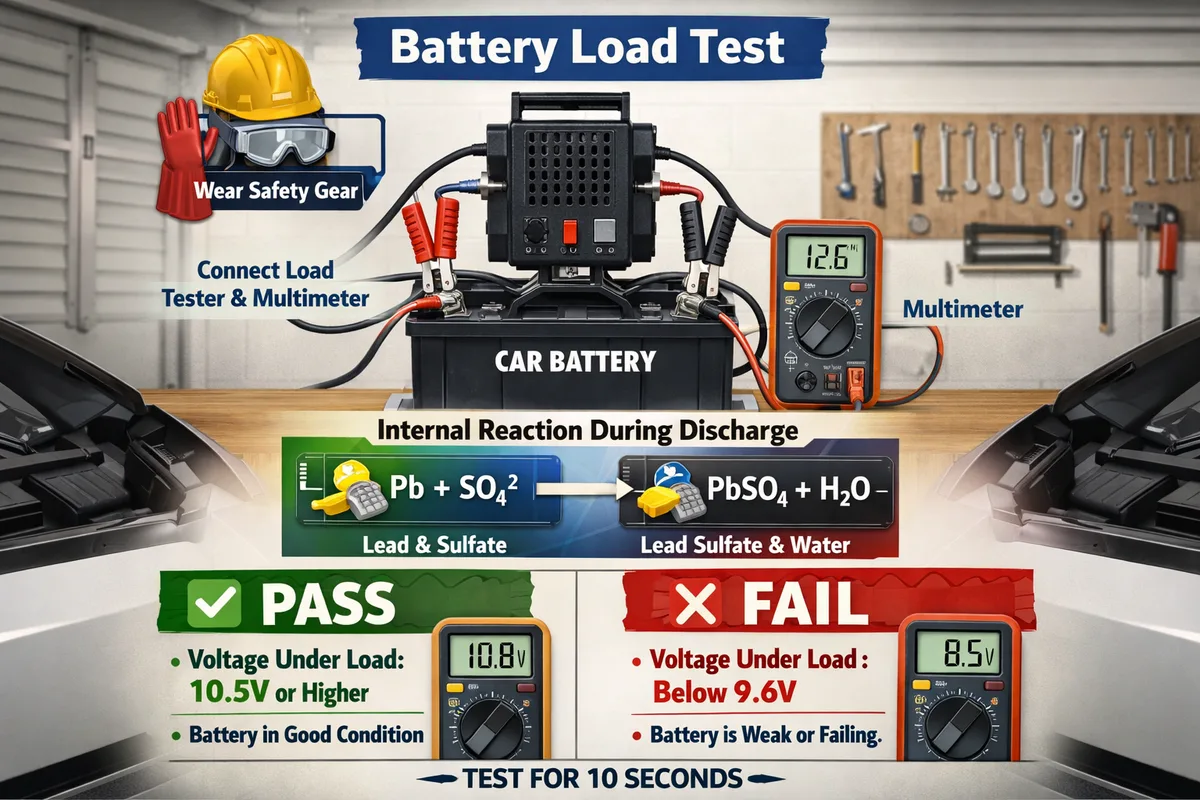
Check your battery’s resting voltage before play. A fully charged 11.1V pack should read around 12.6V. If it drops below 11.5V quickly, the cells are aging.
Old batteries have higher internal resistance. They convert more energy into heat rather than motion. Replace swollen or damaged packs immediately.
Swelling indicates gas buildup from decomposition.
Wire gauge matters too. Thin stock wires struggle with high-amperage draws. Upgrade to 14AWG or thicker silicone wire for better conductivity.
Loose connections create arc faults. These sparks generate intense localized heat. Inspect solder joints on the trigger microswitch and motor terminals.
Look for discoloration or brittle insulation.
Use a multimeter to test continuity. Set it to resistance mode. Measure across the motor leads.
Infinite resistance means an open circuit. Near-zero resistance suggests a short. Both scenarios cause rapid heating.
Address wiring faults before reloading magazines. Safe operation depends on stable power delivery.
The Preventative Maintenance Workflow
Routine care extends lifespan dramatically. Follow this sequence after every major skirmish event. First, remove all remaining gel beads.
Dry them completely before storage. Moisture left inside corrodes metal springs and gears over time. Next, wipe down external surfaces to prevent dust ingress.
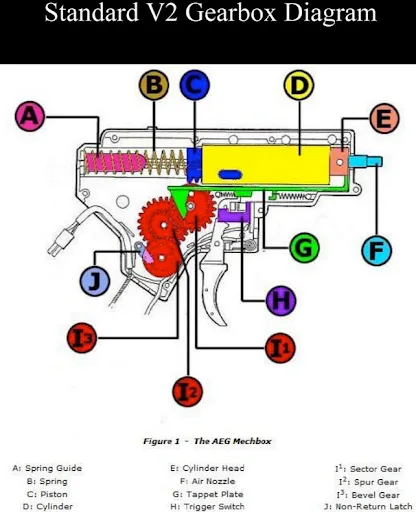
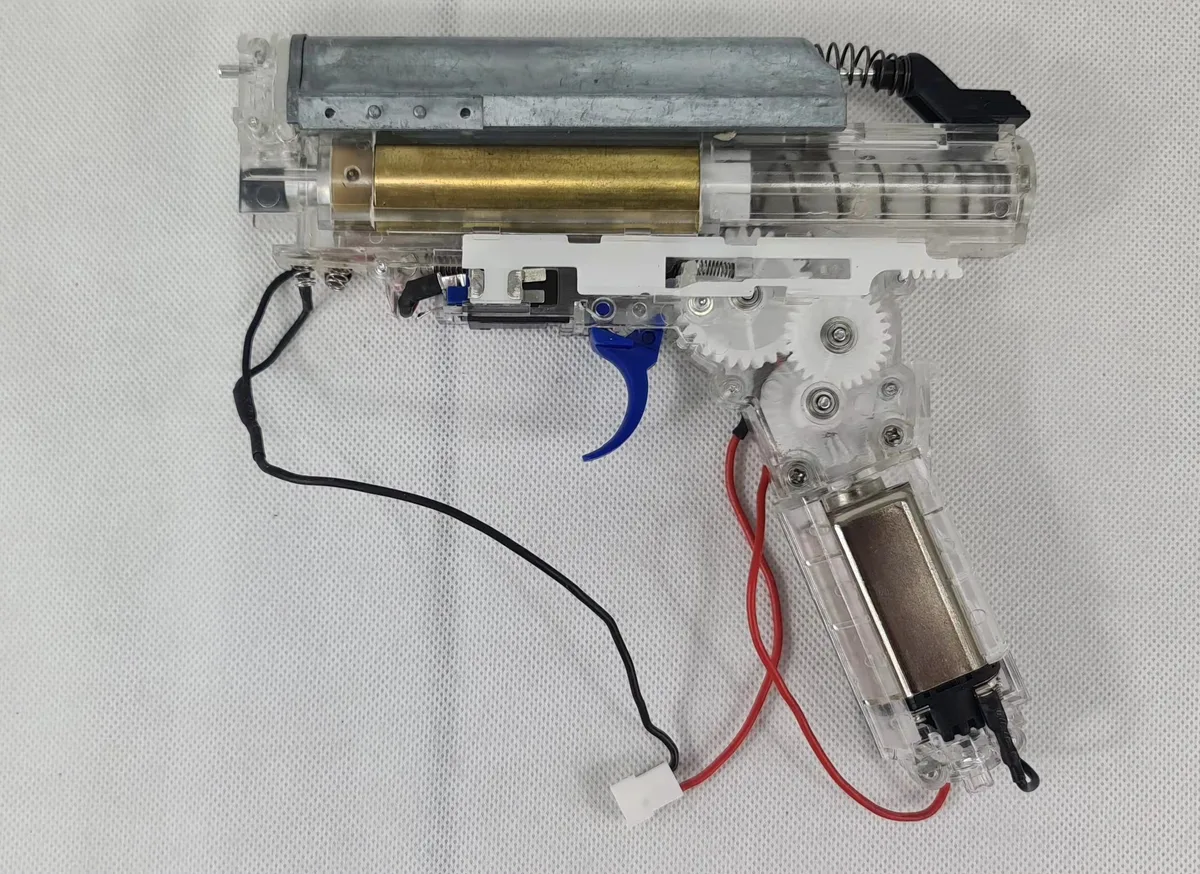
Open the gearbox shell quarterly. Apply fresh silicone oil to gear teeth. Focus on the piston rails and cylinder head seals.
Lubrication reduces friction coefficients significantly. Lower friction means less heat generation during operation. Avoid over-lubricating, as excess oil attracts debris.
A thin film suffices for optimal performance.
Inspect spring fatigue annually. Metal springs lose tension over thousands of cycles. Weak springs fail to reset the piston quickly.
This lag increases dwell time in the compressed state. Longer compression raises internal pressure and temperature. Replace springs showing visible rust or permanent set.
Store guns vertically with barrels pointing down. This prevents residual moisture from pooling in the hop-up chamber. Keep batteries in fire-proof bags when not in use.
Store them at partial charge levels for longevity. Full storage charges stress lithium cells unnecessarily. Proper habits prevent unexpected failures during critical moments.
Common Mistakes That Accelerate Gearbox Damage
Many users attempt to cool a hot gun by spraying it with water. This is catastrophic. Water enters the electrical contacts and causes immediate short circuits.
It also rusts internal steel gears within hours. Always let the unit air-cool naturally at room temperature. Never use compressed air on warm electronics, as it pushes debris deeper into seals.
Another frequent error is ignoring early warning signs. A slight drop in rate of fire often precedes major failure. Users tend to push through this phase to finish a magazine.
This forces the motor beyond its thermal limits. The result is melted insulation on the copper windings. Once that happens, the motor is effectively dead.
Stop firing when performance dips noticeably.
Over-tightening screws during reassembly strips plastic threads. Most splatter ball guns use ABS or nylon housings. These materials crack under excessive torque.
Hand-tighten all casing screws firmly but gently. Use a thread-locker compound only if specified by the manufacturer. Forcing parts back together misaligns the piston cylinder.
This creates uneven wear and persistent friction heat.
Finally, mixing different gel brands in one hopper causes inconsistency. Some beads swell faster than others. This variable sizing jams the feed mechanism randomly.
Stick to one trusted supplier for predictable diameters. Batch-test new gels before loading them fully. Uniformity protects your gearbox from sudden shock loads.
Safety Warnings: When to Stop Shooting Immediately
If you smell burning plastic or ozone, stop instantly. Disconnect the battery before investigating further. Ozone smells sharp and metallic, indicating arcing switches.
Burning plastic suggests melting insulation or warped casings. Continuing to fire risks permanent destruction of the unit. In extreme cases, overheated LiPo cells can vent toxic gases.
Move the device outdoors if smoke appears.
Check for physical deformation in the barrel shroud. Heat warps polymer components easily. A bent barrel alters projectile trajectory dangerously.
It may cause unpredictable ricochets indoors. Inspect the muzzle tip for softness or discoloration. Any sign of structural compromise means retirement.
Do not attempt to reshape cooled plastic with heat guns. This weakens the material matrix further.
Monitor battery temperature closely during extended sessions. Surface temps above 45°C (113°F) are unsafe for handling. Allow packs to reach ambient temperature before charging.
Charging a hot battery accelerates chemical degradation. It increases the risk of thermal runaway. Use smart chargers with balance detection features.
These systems halt charging if cell voltages diverge significantly.
Always wear ANSI Z87.1 rated eye protection. Overheated barrels can eject fragments unexpectedly. Gel residue hardens into glass-like shards when baked.
These projectiles retain velocity despite damage. Treat every malfunction as a potential hazard. Secure loose clothing and hair away from moving parts.
Safety protocols exist because mechanical failures happen suddenly.
Frequently Asked Questions
How long should I rest my splatter ball gun between magazines?
Manufacturer guidelines suggest a ten-to-one ratio for continuous fire. Fire for one minute, then rest for ten. This allows internal heat dissipation without active cooling methods.
Short bursts prevent thermal buildup in the gearbox. Always check the specific manual for your model’s duty cycle limits.
Can I use cooking oil to lubricate my gel blaster gears?
No. Cooking oils oxidize and turn sticky over time. They attract dust and grit rapidly.
This abrasive paste destroys gear teeth quickly. Use only pure silicone-based lubricants designed for plastics. These fluids remain stable and non-corrosive.
Petroleum jelly is also unsuitable for modern polymers.
Why does my gun shoot slower after cleaning?
Residual cleaner may dilute existing grease temporarily. Let the unit run dry-fired for a few seconds. This redistributes fresh lubricant evenly across surfaces.
Ensure no excess fluid pools in the cylinder head. Proper distribution restores consistent piston speed immediately.
Is it safe to store loaded magazines overnight?
Never store wet gels inside the hopper for long periods. Moisture promotes mold growth and rubber degradation. Empty the magazine completely after each session.
Rinse and dry the feeder tube thoroughly. Store spare beads in sealed containers away from humidity. This preserves both ammo quality and internal seals.
🔧 Workbench Essentials: Blaster Maintenance & Unjamming Tools
Keep your nylon gearbox running smoothly and resolve feeding jams with lab-verified maintenance supplies:
- 100% Pure Silicone Oil:Check Pure Silicone Gearbox Lubricant on Amazon →
- Barrel Cleaning & Unjamming Kit:Check Barrel Cleaning & Unjamming Kits on Amazon →
*FTC Disclosure: As an Amazon Associate, SplatterBallGun earns from qualifying purchases.*

Similar Posts