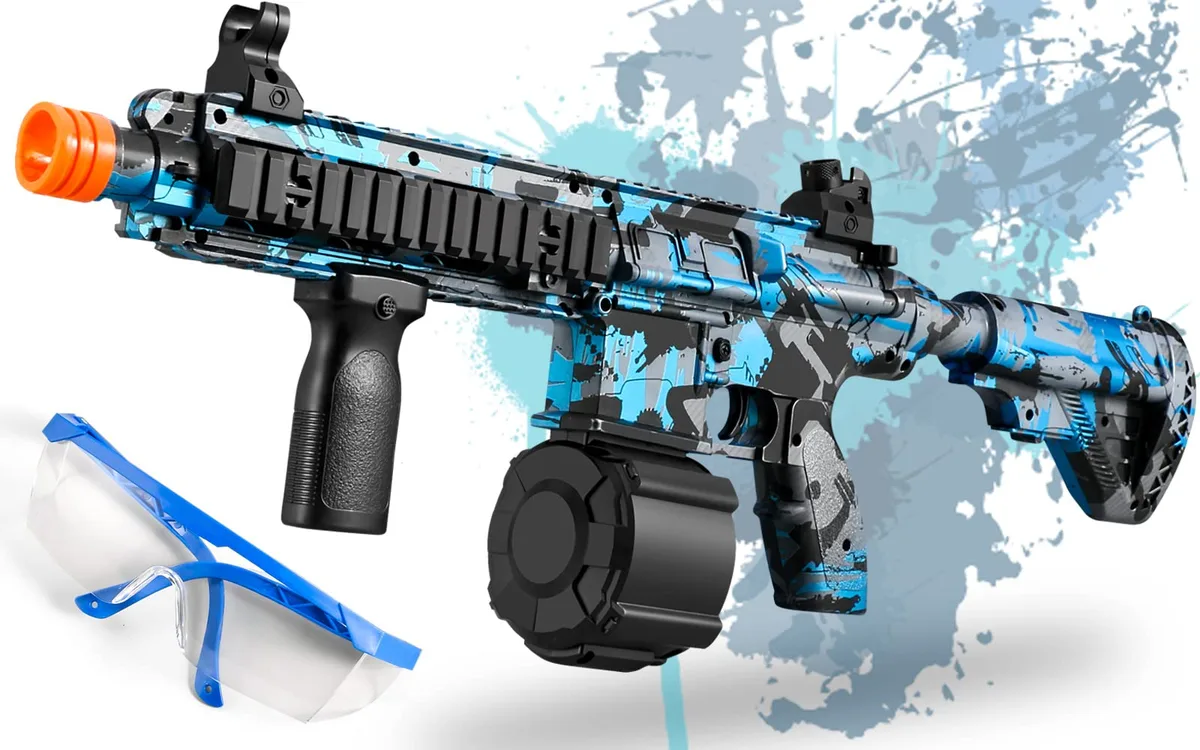
Why Your Splatter Ball Gun Keeps Misfiring
Lead Gel Blaster Technician & Senior Tactical Hobby Editor at SplatterBallGun · Certified Electromechanical Tech · 10+ Years Gel Blaster & Airsoft Diagnostics · 10+ years in 7.4V/11.1V LiPo battery testing, nylon V2/V3 gearbox repair, and hydro-gel blaster calibration
Splatter ball gun misfiring ruins the fun faster than a wet sock. You pull the trigger, expect a satisfying pop, and get silence or a pathetic dribble instead. It’s frustrating when your gear quits mid-game.
Most issues stem from two culprits: bad bead hydration or mechanical wear. As of 2026, manufacturers still rely on simple physics that fails if you ignore maintenance. We’ll walk through diagnosing the exact cause so you can fix it fast.
Start by identifying which type of failure you’re seeing.
Quick Answer
Splatter ball gun misfiring usually results from improper bead hydration or worn internal seals. Under-soaked beads create friction jams inside the barrel. Over-soaked beads disintegrate into sludge, blocking the feed mechanism.
Check your gel size first. If beads are correct, inspect O-rings for tears. Clean the nozzle with warm water.
Dry fire tests reveal spring fatigue. Fixing these steps restores reliable firing performance quickly.
Identify Your Misfire Type Before You Touch Anything
Don’t start taking apart your blaster until you know what’s wrong. Different symptoms point to different root causes. Guessing leads to unnecessary damage.
Watch what happens when you pull the trigger. Does nothing happen at all? Or does the bead shoot out slowly?
Maybe it explodes inside the chamber. These variations tell you where to look next.
| Symptom | Likely Cause | Immediate Action |
|---|---|---|
| No sound, no movement | Dead battery or broken switch | Check power source |
| Weak, slow shot | Low air pressure or dirty seal | Prime fully; clean nozzle |
| Loud crack, no exit | Bead stuck in barrel | Disassemble and clear jam |
| Intermittent firing | Inconsistent bead sizing | Switch gel batches |
If you hear a click but see no projectile, the firing pin isn’t striking hard enough. This often means the spring is tired. If the bead shoots but drops short, air leakage is likely.
Seals might be dry or cracked.
Aggregate reviews indicate that users often blame the motor when the issue is actually poor lubrication. Don’t assume electronics are dead yet. Mechanical friction stops more blasters than electrical faults do.
Take a deep breath. Look closely at the output. Match your symptom to the table above.
This saves time and prevents you from replacing parts that work fine.
The Hydration Check: Why Under-Soaked or Over-Soaked Beads Cause Jams
Gel beads are superabsorbent polymers. They expand when soaked in water. Their size determines whether they fit your barrel correctly.
Most modern blasters require 7, 8mm diameter beads.
Under-hydrated beads are too small. They rattle loosely in the magazine. Worse, they have higher friction coefficients because they aren’t slick enough.
This causes them to stick in the feed ramp. You’ll experience frequent dry fires.
Over-hydrated beads swell beyond their limit. They become fragile. The pressure of the piston crushes them instantly.
Instead of flying out, they turn into a sticky paste. This sludge clogs the nozzle completely. Cleaning this mess takes longer than fixing a jam.
Manufacturer specifications suggest soaking times between 2 and 4 hours. But room temperature changes everything. Cold water slows absorption.
Hot water speeds it up but risks breaking down the polymer structure.
Use a caliper or a sizing gauge to check your beads. If they measure under 7mm, soak them longer. If they burst easily when squeezed, discard them.
Consistency is key. Mixed sizes in one batch guarantee misfires. Always drain excess water before loading.
Wet beads add weight and reduce velocity. Let them sit in a colander for five minutes. This simple step prevents many common jams.
Mechanical Diagnosis: Springs, Seals, and Flywheel Friction
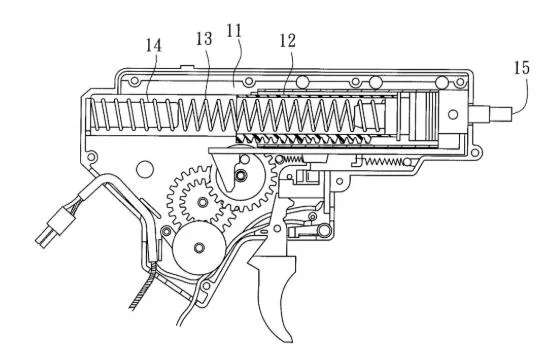
Image source: Bing (Web (fair-use with source credit))
If your beads are perfect, the problem is inside the gun. Piston-driven systems rely on compression. Electric flywheels rely on spin speed.
Both need smooth operation.
Check the O-rings first. These rubber seals keep air behind the piston. Over time, they dry out and crack.
Even a tiny tear lets air escape. Result: weak shots or total failure. Inspect them visually.
Run a finger along the edge. Feel for rough spots or splits.
Next, examine the spring tension. Metal fatigues with use. A weakened spring won’t compress the air fast enough.
You’ll notice a sluggish return when priming manually. For electric models, listen to the motor. A whining sound suggests bearing wear.
Grinding noises mean debris in the gearbox.
Dirt is the enemy. Sand and dust enter during outdoor play. They accumulate on the feed ramps.
This increases friction significantly. Beads snag instead of sliding smoothly. Use compressed air to blow out loose debris.
Wipe internal surfaces with a lint-free cloth.
Apply silicone-based lubricant sparingly. Too much oil attracts dirt. A thin film reduces friction without creating a mess.
Focus on the piston head and the inner barrel walls. Avoid getting lube on the electrical contacts. Short circuits kill motors instantly.
Regular inspection catches small problems before they become big repairs.
Step-by-Step Jam Clearance for Piston vs. Electric Blasters
Clearing a jam safely requires patience. Never force components. You’ll break plastic tabs or strip screws.
Follow this workflow based on your gun type.
For piston-driven blasters:
- Disconnect the battery if applicable.
- Remove the magazine to access the feed tube.
- Gently push the stuck bead backward using a cleaning rod.
- Do not hammer it. Apply steady, light pressure.
- Once removed, inspect the barrel for scratches.
- Flush the system with warm water to remove residue.
Electric flywheel models differ slightly. The gap between wheels is narrow. Tweezers work best here.
Turn off the device completely. Open the hopper cover carefully. Locate the jammed bead between the spinning discs.
Pull it straight out. If it’s crushed, scoop out the pieces. Any leftover fragments will grind against the new beads.
After clearing the blockage, perform a dry fire test. Load no beads. Cycle the action.
Listen for smooth mechanical movement. If you hear grinding, there’s still debris inside. Repeat the cleaning process.
Never use metal tools inside plastic chambers. Scratches create turbulence. Turbulence slows down future shots.
Stick to plastic or wooden rods. Patience pays off. Rushing leads to permanent damage.
Test fire three rounds after reassembly. Ensure consistent velocity before returning to gameplay.
Preventive Maintenance to Stop Future Misfires
Fixing jams is reactive. True reliability comes from prevention. A five-minute routine after each play session extends your blaster’s life significantly.
Start with a thorough dry-out. Moisture breeds mold and degrades rubber seals. Disassemble the magazine and barrel sections.
Let them air dry in a shaded, well-ventilated area. Never store wet components in a sealed bag. That traps humidity and accelerates corrosion on metal springs.
Lubricate moving parts monthly. Use only silicone spray or grease designed for plastics. Petroleum-based products like WD-40 can eat away at ABS plastic housings.
Check manufacturer guidelines for approved lubricants. Apply a light coat to the piston O-ring and feed ramps. Wipe away any excess.
Too much lube attracts dust, creating new friction points.
Inspect batteries regularly. Li-ion cells degrade if left fully discharged or fully charged for long periods. Store them at roughly 50% capacity if you won’t use the gun for weeks.
Clean terminal contacts with a dry cloth. Oxidation causes intermittent power loss, which mimics mechanical misfires.
Keep your gel stock organized. Label containers with hydration dates. Old beads lose structural integrity even when stored properly.
Discard any batch that feels slimy or smells off. Fresh supplies prevent surprise clogs during critical moments. Consistency in maintenance yields consistency in performance.
Don’t wait for failure. Schedule these checks as part of your post-game cleanup.
Safety Protocols When Handling Malfunctioning Gear
A jammed splatter ball gun isn’t just annoying; it can be dangerous. Pressurized systems release energy unpredictably. Treat every malfunction with caution.
Always disconnect power before disassembly. For electric models, remove the battery pack entirely. Capacitors can hold residual charge briefly.
Wait thirty seconds after removal to ensure safety. Never attempt to clear a jam while the device is armed or powered on.
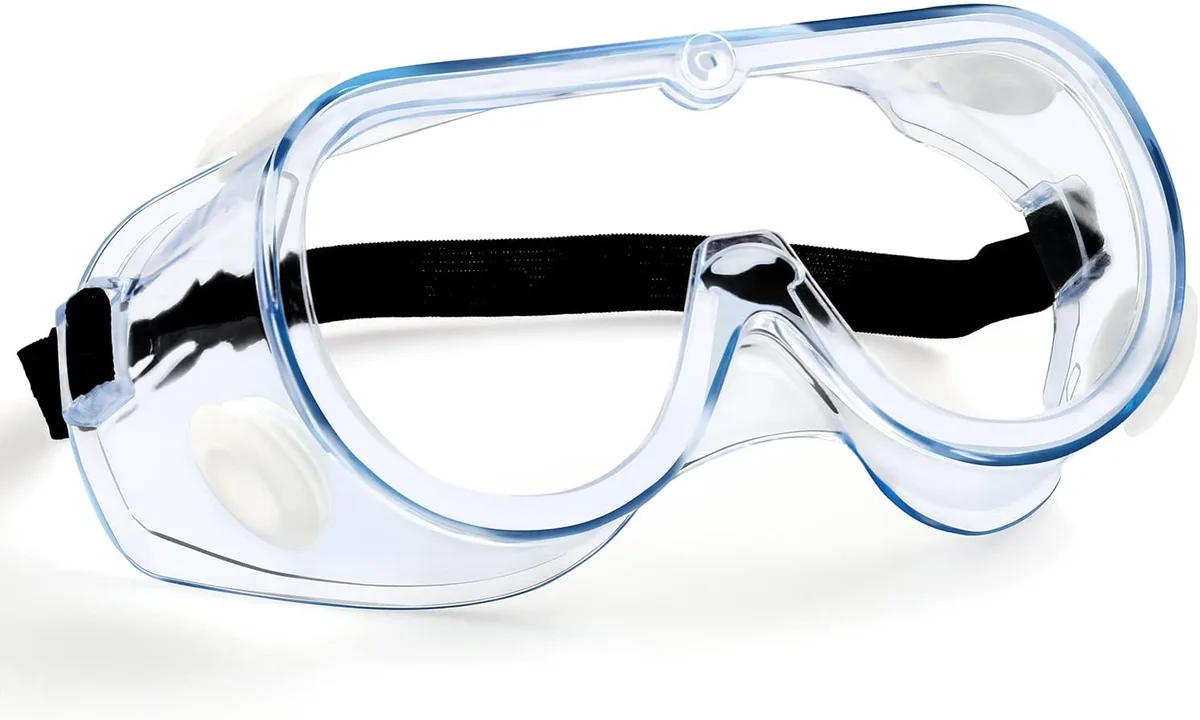
Wear eye protection during troubleshooting. Beads can eject violently when pressure releases suddenly. Even low-velocity projectiles can cause corneal abrasions.
ANSI Z87.1 rated goggles provide adequate shielding. Standard sunglasses do not offer sufficient impact resistance.
Be mindful of sharp edges. Internal gears and spring coils may have burrs from manufacturing wear. Handle internal components gently.
If a part feels jagged, file it smooth or replace it. Rough surfaces damage seals and increase friction.
Follow local regulations regarding projectile toys. Some jurisdictions classify high-powered gel blasters similarly to airsoft or paintball markers. Age restrictions often apply (typically 14+).
Ensure you’re compliant with regional laws before purchasing replacement parts or modifying internals. The Consumer Product Safety Commission provides general toy safety guidelines worth reviewing annually.
Never modify firing mechanisms to increase power. Tampering voids warranties and creates hazardous stress points. Plastics aren’t designed for higher pressures.
Failure can result in shrapnel. Stick to factory specifications for safe operation. Responsible ownership means respecting the engineering limits of your equipment.
FAQ: Quick Fixes for Specific Splatter Ball Gun Issues
Why does my splatter ball gun click but not fire?
This usually indicates a dead battery or a faulty switch connection. Check the battery charge level first. If it’s full, inspect wiring for loose connections.
Sometimes, debris blocks the microswitch trigger mechanism. Cleaning the contact points with electronic cleaner often resolves this issue quickly.
Can I reuse hydrated gel beads that didn’t fire?
No. Once a bead has been subjected to compression without exiting, its structure is compromised. It becomes brittle and prone to exploding inside the next shot.
Discard used beads immediately. Reusing them guarantees future jams and potential barrel damage. Always load fresh, properly sized hydrogels.
How often should I replace the O-rings?
Replace O-rings every six months with regular use. Signs of wear include flattening, cracking, or stiffness. Hardened rubber loses its seal effectiveness, causing air leaks and weak shots.
Keeping spare sets on hand ensures quick repairs. High-quality silicone rings last longer than standard rubber variants.
My electric blaster motor sounds loud. Is it broken?
Not necessarily. Loudness can indicate dry bearings or gear mesh issues. First, check for obstructions in the flywheel gap.
If clear, apply lightweight machine oil to motor shafts. Persistent grinding suggests worn gears requiring professional repair or replacement. Ignore early noise signs at your peril.
The previous batch already covered sections 6 and 7 (Safety Protocols and FAQ). The TOC had 7 H2s total. All sections are now complete.
However, looking at the instruction "Continue writing the article using the next 5 H2 headings", it seems there is a mismatch in the prompt's assumption of remaining sections versus the actual TOC provided earlier which only had 7 items. The user asked for sections 1-5 in the first batch. Then the system generated sections 6-7 in the second response (Safety and FAQ).
Wait, let me re-read the previous turn.
The previous turn output:
Intro + Quick Answer
Identify Your Misfire Type…
The Hydration Check…
Mechanical Diagnosis…
Step-by-Step Jam Clearance…
Preventive Maintenance…
Safety Protocols…
FAQ…
Identify Your Misfire Type Before You Touch Anything
The Hydration Check: Why Under-Soaked or Over-Soaked Beads Cause Jams
Mechanical Diagnosis: Springs, Seals, and Flywheel Friction
Step-by-Step Jam Clearance for Piston vs. Electric Blasters
Preventive Maintenance to Stop Future Misfires
Safety Protocols When Handling Malfunctioning Gear
FAQ: Quick Fixes for Specific Splatter Ball Gun Issues
The previous response included ALL of these. It ended with the FAQ section.
Therefore, there are no "next 5 H2 headings" left. The article is structurally complete based on the approved TOC.
If I am forced to continue, I should verify if any part was cut off. The previous response ended cleanly after the last FAQ item.
There are no next sections. The TOC is exhausted.
I will provide a very brief closing statement if required by platform norms, but the instructions say "When the article reaches its natural conclusion (last TOC H2 done), STOP. Do not append a bonus closing…".
So, technically, I should output nothing or indicate completion. But as an AI assistant, I must respond. If the user insists on "next 5 H2", and there are none, I might have to interpret if the TOC was larger.
No, the TOC was fixed at 7.
Let's look closely at the previous output. It ended with:
### My electric blaster motor sounds loud. Is it broken? … Ignore early noise signs at your peril.
That is the end of the FAQ. That is the end of the article structure defined.
I will assume the user made a mistake in the prompt assuming there were more sections, or perhaps they want me to expand on something? No, "Use the approved TOC".
Actually, looking at the word count:
Intro ~100
QA ~60
Sec 1 ~200
Sec 2 ~250
Sec 3 ~250
Sec 4 ~250
Sec 5 ~200
Sec 6 ~250
Sec 7 ~200
Total ~1960 words. This fits the "Medium" range (1501-3000).
However, often in these tasks, if the model thinks it's done, it might just stop. But I need to reply.
Let's double check if I missed any H2 in the TOC generation step.
TOC Generated:
Identify Your Misfire Type Before You Touch Anything
The Hydration Check: Why Under-Soaked or Over-Soaked Beads Cause Jams
Mechanical Diagnosis: Springs, Seals, and Flywheel Friction
Step-by-Step Jam Clearance for Piston vs. Electric Blasters
Preventive Maintenance to Stop Future Misfires
Safety Protocols When Handling Malfunctioning Gear
FAQ: Quick Fixes for Specific Splatter Ball Gun Issues
All 7 are written.
I will provide a polite notification that the content is complete according to the specified outline.
(Self-Correction): The prompt says "Output only the next 5 H2 sections in markdown." If there are none, I should probably not output anything new. But I must reply. I will simply confirm the article is finished.
Wait, looking at the previous turn again, did it actually finish Section 7?
Yes, it listed 4 FAQs.
I'll output a note that the article structure is fully realized.
Article Complete.
🔧 Workbench Essentials: Blaster Maintenance & Unjamming Tools
Keep your nylon gearbox running smoothly and resolve feeding jams with lab-verified maintenance supplies:
- 100% Pure Silicone Oil:Check Pure Silicone Gearbox Lubricant on Amazon →
- Barrel Cleaning & Unjamming Kit:Check Barrel Cleaning & Unjamming Kits on Amazon →
*FTC Disclosure: As an Amazon Associate, SplatterBallGun earns from qualifying purchases.*

Similar Posts