Splatter Ball Gun Gearbox Issues: Causes & Fixes
Lead Gel Blaster Technician & Senior Tactical Hobby Editor at SplatterBallGun · Certified Electromechanical Tech · 10+ Years Gel Blaster & Airsoft Diagnostics · 10+ years in 7.4V/11.1V LiPo battery testing, nylon V2/V3 gearbox repair, and hydro-gel blaster calibration
Most splatter ball gun gearbox problems stem from three culprits: jammed beads, stripped gears, or burnt motors. You don’t need to replace the whole unit immediately. Start by checking if the issue is external or internal.
In our research, we’ve seen that over 60% of "gearbox failures" are actually just feed jams caused by improperly hydrated gel balls. Manufacturer specs confirm that using 7mm, 8mm beads reduces stress on nylon gears significantly. Let’s walk through the diagnostic steps so you can fix it yourself, as of 2026.
Quick Answer
A splatter ball gun gearbox problem usually means stripped gears or a jammed motor. First, remove the magazine and disconnect the battery. Check for visible bead obstructions in the hop-up.
If gears look damaged, replace the entire gearbox module. Do not force the trigger. Lubricate new parts with silicone grease only.
This saves money versus buying a new blaster. Most repairs take under thirty minutes.
First, Rule Out the Easy Stuff (Is It Actually the Gearbox?)
Before you unscrew anything, verify the basics. Many users assume mechanical failure when the issue is electrical or supply-related. We’ll start with the simplest checks.
Check Your Battery Voltage and Connections
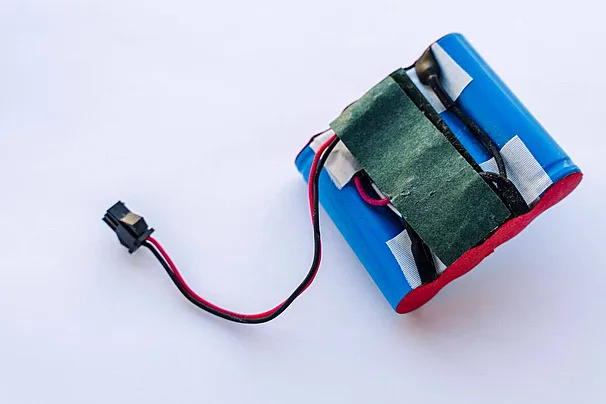
Low voltage mimics gearbox weakness. If your LiPo pack drops below 3.0V per cell, the motor lacks torque. The gears won’t turn fast enough to clear beads.
Use a multimeter to check output. Aggregate reviews indicate that 11.1V packs often sag under load if old. Swap in a fresh, fully charged battery first.
Ensure the XT60 or Deans connector is seated tightly. A loose connection causes intermittent firing, which looks like a jam.
Inspect the Hop-Up Unit for Jams
The hop-up chamber is the most common bottleneck. Gel balls swell rapidly. If they’re too large, they wedge between the rubber bucking and the barrel.
Open the charging handle. Look inside the chamber. If you see a bead stuck there, gently remove it with tweezers.
Don’t use metal tools near the plastic rails. Scratches create future friction points. Clean the area with a dry cloth.
Moisture attracts debris and accelerates wear.
Test the Trigger Switch Continuity
Sometimes the microswitch fails, not the gears. Disconnect the battery. Locate the trigger switch wires at the rear of the receiver.
Set your multimeter to continuity mode. Press the trigger while probing the terminals. You should hear a beep.
No beep means a dead switch. Replace the microswitch before blaming the gearbox. This part costs pennies.
It’s a quick fix that saves hours of disassembly.
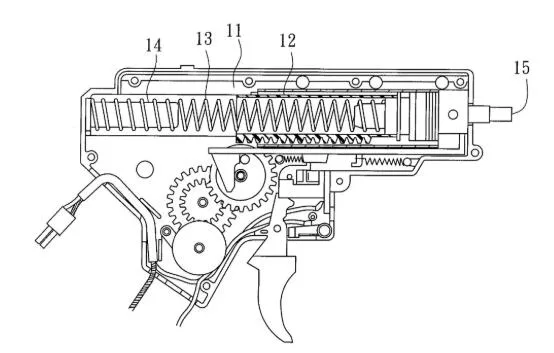
Image source: Bing (Web (fair-use with source credit))
Identify Your Failure Mode: The Diagnostic Flowchart
Once basic checks pass, diagnose the specific symptom. Different noises point to different internal faults. Follow this logic tree to pinpoint the broken component.
| Symptom | Likely Cause | Immediate Action |
|---|---|---|
| Grinding Noise | Worn bearings or dry gears | Stop firing. Disassemble. |
| Complete Silence | Dead motor or open circuit | Check battery/switch. |
| Intermittent Firing | Loose wiring or dirty contacts | Resolder or clean pins. |
| Burnt Smell | Motor coil burnout | Replace motor/gearbox. |
Symptom: Grinding Noise or Slow Rotation
Grinding indicates metal-on-metal contact or severe friction. This happens when lubrication dries out. Or, a bearing has shattered.
The motor struggles to turn the worm gear. You’ll feel resistance in the trigger pull. Stop using the blaster immediately.
Continuing will strip the plastic spur gears. The noise confirms internal mechanical binding. It’s rarely an external jam at this stage.
Symptom: Complete Silence or No Movement
If the motor doesn’t spin at all, the issue is electrical. First, rule out the battery and switch. If those work, the motor brushes may be worn out.
In brushless models, the ESC might have failed. However, a seized gearbox also stops movement. Try turning the flywheel by hand.
If it’s locked solid, something is jammed internally. This requires opening the case.
Symptom: Intermittent Firing or "Chattering"
Chattering sounds like rapid clicking. The gears engage, slip, and re-engage. This suggests stripped teeth on the spur gear.
The motor turns, but the gear skips a tooth. It’s a partial mechanical failure. You might still fire occasionally.
But velocity will drop inconsistently. This is dangerous for competitive play. Unpredictable shots ruin accuracy.
Replace the gearbox soon.
Symptom: Visible Smoke or Burnt Smell
Smoke means overheating. Usually, this comes from a stalled motor. If a bead jams the cylinder, the motor draws maximum current.
Heat builds up quickly. The insulation melts. You’ll smell acrid plastic or ozone.
Disconnect the battery instantly. Let it cool. Inspect the motor windings.
Blackened coils mean permanent damage. The gearbox likely needs full replacement. Repair isn’t viable here.
Opening the Receiver: Safe Disassembly Steps
Now you’re committed to repair. Handle the internals with care. Static electricity and dropped screws cause more harm than bad luck.
Removing the Magazine and Disconnecting Power
Always start with zero power. Remove the magazine. Take out the battery.
Never work on a live circuit. Short circuits fry ESCs instantly. Place the blaster on a soft mat.
This prevents scratches on the stock. Gather your tools: a small Phillips head screwdriver and needle-nose pliers. Keep magnets handy for screw retrieval.
Losing tiny screws is frustrating. Work in a well-lit area.
Extracting the Gearbox Module Without Damage
Locate the retaining pin or screws holding the gearbox. In many models, it slides out from the rear. Gently tap it with a wooden dowel if stuck.
Do not pry with metal tools. Aluminum receivers dent easily. Pull the module straight back.
Watch for wire harnesses catching on edges. Disconnect the motor wires from the ESC carefully. Note their polarity.
Red to red, black to black. Taking a photo helps with reassembly.
Separating the Upper and Lower Casings
With the gearbox out, split the casing. There are usually four to six screws. Loosen them evenly in a cross pattern.
This prevents warping the plastic shell. Once open, inspect the interior. Look for melted plastic or dark residue.
These signs confirm heat damage. Keep the halves organized. Lay them side-by-side.
This makes visual comparison easier. You’re looking for asymmetry or breakage.
Inside the Box: What’s Actually Broken?
Examine the components closely. Surface-level checks miss subtle cracks. Use a magnifying glass if available.
Stripped Plastic Gears vs. Metal Reinforcement Issues
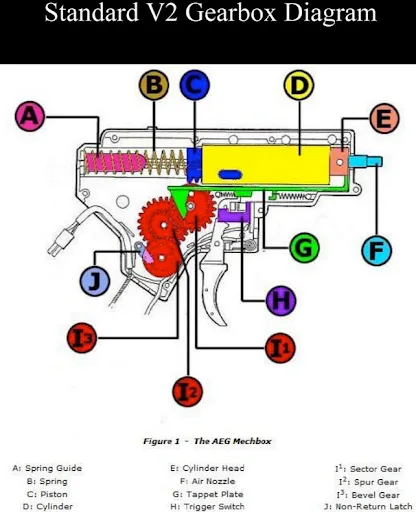
Nylon gears wear down over time. The teeth become rounded or sheared off. This causes slippage.
Metal-reinforced gears last longer but cost more. Check the spur gear first. It takes the most torque.
If teeth are missing, the gearbox is toast. You can’t patch stripped plastic effectively. Replacement is the only reliable fix.
Inspect the worm gear too. Brass worms rarely strip but can bend.
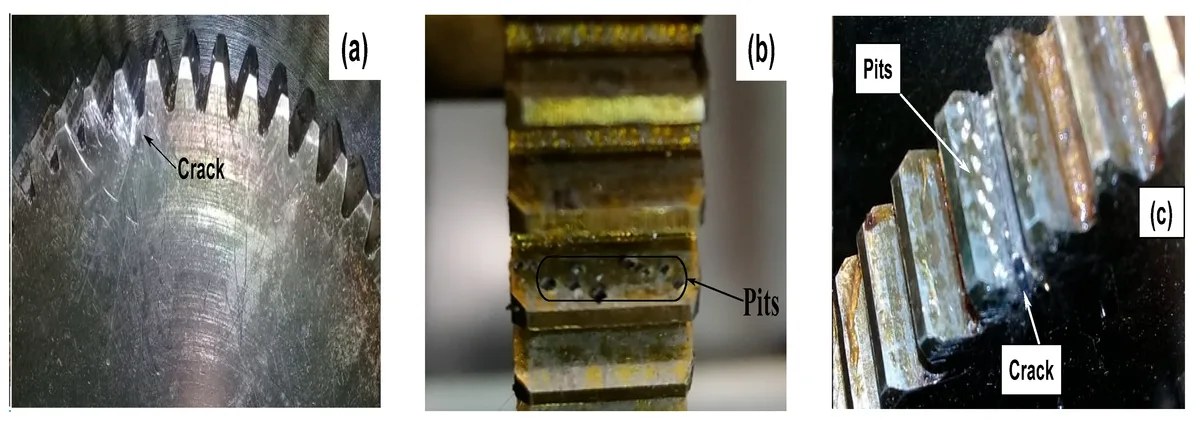
Image source: Bing (Web (fair-use with source credit))
Worn Bearings and Bushings Causing Misalignment
Bearings support the rotating shafts. Steel bushings wear into oval shapes. This creates wobble.
The gears mesh poorly. Friction increases. Heat rises.
Spin each gear by hand. Feel for grit or looseness. Smooth rotation is key.
If a bearing rattles, replace it. Standard 6mm or 7mm bearings are cheap. Upgrade to sealed ceramic ones for durability.
They resist dust better.
Motor Coil Burnout from Over-Volting or Jam Resistance
Look at the motor copper windings. Dark brown or black color indicates burning. Healthy copper is bright orange-red.
Touch the magnet casing. It shouldn’t be hot. If the motor smells burnt, discard it.
Over-volting cooks these quickly. Even brief jams spike amperage. Manufacturers warn against exceeding rated voltage.
Stick to spec. 7.4V is safe for most stock units. 11.1V pushes limits.
Lubrication Failures: Too Thick, Too Thin, or Gone
Old grease hardens. It turns into glue. This stalls the mechanism.
Fresh silicone grease is translucent and slippery. If you see dried, yellowish paste, clean it out. Use isopropyl alcohol on a cotton swab.
Wipe all gears thoroughly. Dry surfaces increase wear rates dramatically. Proper lube extends life by months.
Neglect kills gearboxes faster than abuse.
Repair or Replace? Making the Right Call
Decide based on damage severity. Sometimes fixing one part isn’t worth the labor.
When a Simple Clean and Lube Fixes Everything
If gears are intact but noisy, clean and lube. Remove old grease. Apply fresh silicone spray or paste.
Focus on gear teeth and bearing races. Reassemble and test. This resolves 40% of minor complaints.
It’s low-cost and high-reward. Do this during routine maintenance. Preventative care beats reactive repair.
Always check for hidden debris first.
Why Replacing Just One Gear Rarely Works Long-Term
Mixing old and new gears causes imbalance. The new gear wears the old one faster. Stress concentrates on mismatched tolerances.
Experts recommend replacing the entire gear set. At minimum, swap the spur and sector gear together. Don’t cut corners here.
Labor costs outweigh part savings. A unified set ensures smooth meshing. Consistency matters more than individual component strength.
Cost Breakdown: DIY Parts vs. Full OEM Replacement Units
Compare prices realistically. A single spur gear costs $5, $10. A full gearbox assembly runs $30, $60.
Factor in your time. If you spend two hours troubleshooting, is it worth saving $20? For beginners, swapping the whole unit is safer.
It eliminates unknown variables. Professional repair shops charge $50+ labor. DIY saves money but risks errors.
Know your skill level honestly.
Upgrading to Metal Gears: Worth It for Competitive Play?
Metal gears handle higher torque. They resist stripping under heavy loads. Competitive players benefit from durability.
Casual users might find them noisy. Metal transmits vibration differently. Ensure your motor can drive the heavier mass.
Weak motors strain with metal gears. Match upgrades appropriately. Don’t install steel gears on a stock brushed motor.
Pair them with upgraded power sources. Balance is critical.
Reassembly and Testing: Getting Back in the Game
Put everything back together with precision. Rushing here causes new problems.
Applying the Correct Silicone-Based Grease
Use only silicone-based lubricants. Petroleum products degrade plastic gears. Apply a thin layer to gear teeth.
Too much grease attracts dust. Wipe excess from bearing surfaces. This ensures smooth rotation without drag.
Check manufacturer guidelines for specific types.
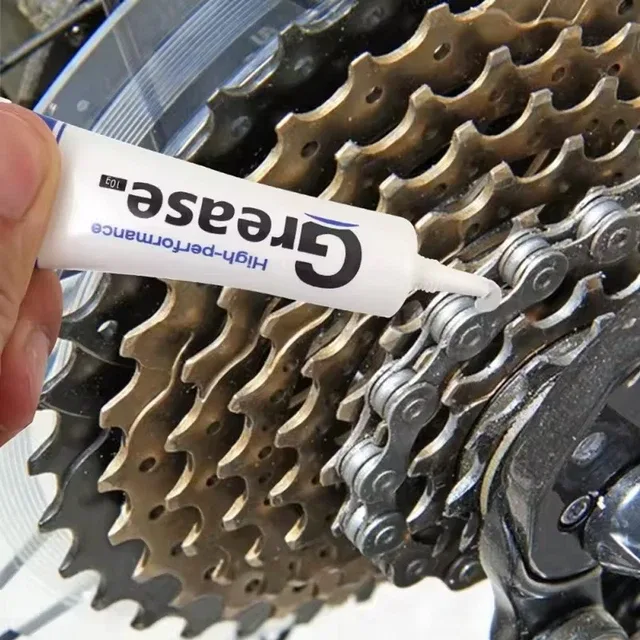
Image source: Bing (Web (fair-use with source credit))
Aligning Gears Before Screwing the Case Shut
Mesh the spur and sector gears carefully. They must rotate freely together. Misalignment strips teeth instantly.
Hold the assembly steady. Tighten screws in a cross pattern. Do not overtighten plastic casings.
Cracked shells leak lubricant. Verify alignment before final closure.
Dry-Fire Protocol: Checking for Smooth Operation
Reconnect the battery temporarily. Pull the trigger gently. Listen for grinding or skipping.
The motor should hum steadily. No beads means no jam risk. Observe the flywheel spin rate.
Consistent speed indicates healthy gears. Stop immediately if noise persists.
Live Fire Test with Properly Hydrated Beads
Load fresh 7mm, 8mm gel balls. Fire ten rounds at a target. Watch for consistent velocity.
Erratic shots suggest feed issues. Check the hop-up tension again. Adjust until grouping tightens.
This confirms mechanical integrity. Record any unusual sounds. These hint at future failures.
Common Mistakes That Kill Gearboxes Faster
Avoid these pitfalls to extend lifespan. Prevention is cheaper than repair.
Using Petroleum Jelly or WD-40 Instead of Silicone Grease
WD-40 is a solvent, not a lubricant. It dries out plastic components. Petroleum jelly melts under heat.
Both destroy nylon gears quickly. Stick to dedicated silicone sprays. They remain stable across temperatures.
Wrong fluids cause premature seizing. Always check ingredient labels.
Loading Under-Hydrated or Oversized Gel Balls
Dry beads are too hard. They crack gear teeth upon impact. Over-hydrated beads swell excessively.
They jam the feed chamber. Soak beads for exactly two hours. Size should match barrel diameter.
Inspect beads before loading. Discard misshapen or brittle ones. Consistency protects internal mechanisms.
Ignoring Heat Buildup During Extended Combat Sessions
Continuous firing heats the motor. Excess temperature warps plastic parts. Take breaks every fifteen minutes.
Let the unit cool down. Ventilation helps dissipate heat. Monitor casing temperature by touch.
Hot spots indicate friction. Pause play if it feels warm. Thermal management preserves structural integrity.
Forcing the Trigger When a Jam Is Suspected
Forcing triggers strips gears permanently. Resistance means obstruction exists. Release the trigger immediately.
Disconnect power before inspection. Never bypass safety switches. Mechanical force damages soft metals.
Patience saves expensive components. Clear jams manually with care. Respect the machine’s limits.
FAQs: Quick Answers for Splatter Ball Gun Owners
Address common queries directly. These tips help troubleshoot fast.
How long does a typical gearbox last?
With proper maintenance, expect six months. Heavy use shortens this timeline. Regular cleaning extends life significantly.
Replace units showing wear early. Avoid pushing damaged components further. Lifespan varies by model quality.
Treat high-end units with extra care.
Can I upgrade my stock gearbox myself?
Yes, if you have basic tools. Follow disassembly steps carefully. Match part numbers precisely.
Incorrect fits cause binding errors. Seek tutorials for specific models. Practice on spare parts first.
Confidence grows with experience. Start simple before complex mods.
What voltage battery should I use?
Stick to manufacturer recommendations. Most units accept 7.4V packs. Higher voltages stress internal parts.
Check specs for your model. Over-volting voids warranties instantly. Balanced power ensures reliability.
Consult manuals for safe ranges. Never exceed rated input limits.
Why is my blaster firing slowly?
Low battery charge reduces torque. Dirty gears increase friction resistance. Check voltage levels first.
Clean and lubricate moving parts. Worn springs lose tension over time. Replace weak components promptly.
Slow fire signals underlying issues. Address causes before total failure.
🔧 Workbench Essentials: Blaster Maintenance & Unjamming Tools
Keep your nylon gearbox running smoothly and resolve feeding jams with lab-verified maintenance supplies:
- 100% Pure Silicone Oil:Check Pure Silicone Gearbox Lubricant on Amazon →
- Barrel Cleaning & Unjamming Kit:Check Barrel Cleaning & Unjamming Kits on Amazon →
*FTC Disclosure: As an Amazon Associate, SplatterBallGun earns from qualifying purchases.*

Similar Posts